Sync Google Calendar with Apple Calendar A Unified Guide
Tired of juggling schedules? Learn how to sync Google Calendar with Apple Calendar on all your devices for a seamless, unified view of your life.
Calendar0 Team
December 30, 2025

If you're anything like me, you live in two digital worlds. Your work life is probably organised in Google Calendar, while your personal life runs on Apple Calendar. It's a common setup, but it’s a recipe for disaster.
That constant shuffle between apps to see if you're actually free? It’s not just annoying—it leads to double-bookings, missed appointments, and that low-grade stress of never being 100% sure about your day.
Getting your calendars in sync isn't just a neat trick; it's about reclaiming your sanity. Imagine looking at one screen and seeing your 2 PM client call right next to your 4 PM dental appointment. That's the goal: a single, unified view of your entire life. It lets you stop reacting to your schedule and start owning it.
Two Paths to a Unified Schedule
So, how do you get there? It really boils down to one simple question: do you need to edit events from both calendars, or just view them?
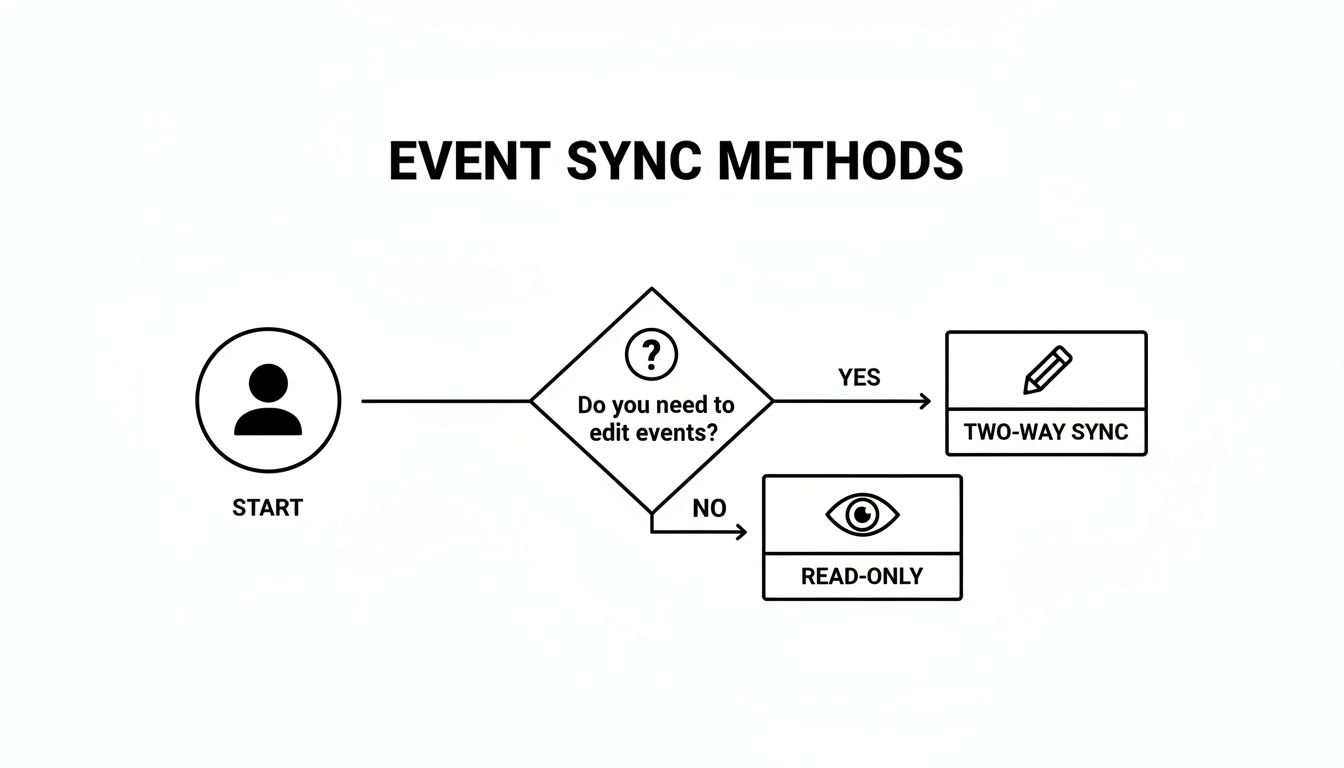
As you can see, if you need to create, edit, or delete Google Calendar events from your iPhone, a full two-way sync is your only real option.
While it sounds simple on paper, bridging the gap between Google and Apple isn't always a walk in the park. In fact, an estimated 35-40% of professionals across Germany and Europe who juggle both platforms run into sync failures or frustrating one-way data flows. It’s a common headache, and you can read more about the technical hurdles of calendar integration on calendarbridge.com.
A perfectly synced calendar eliminates the mental juggling act. You move from reacting to your schedule to proactively managing your time, heading off conflicts before they can even happen.
Let's break down the two main approaches so you can pick the right one for you.
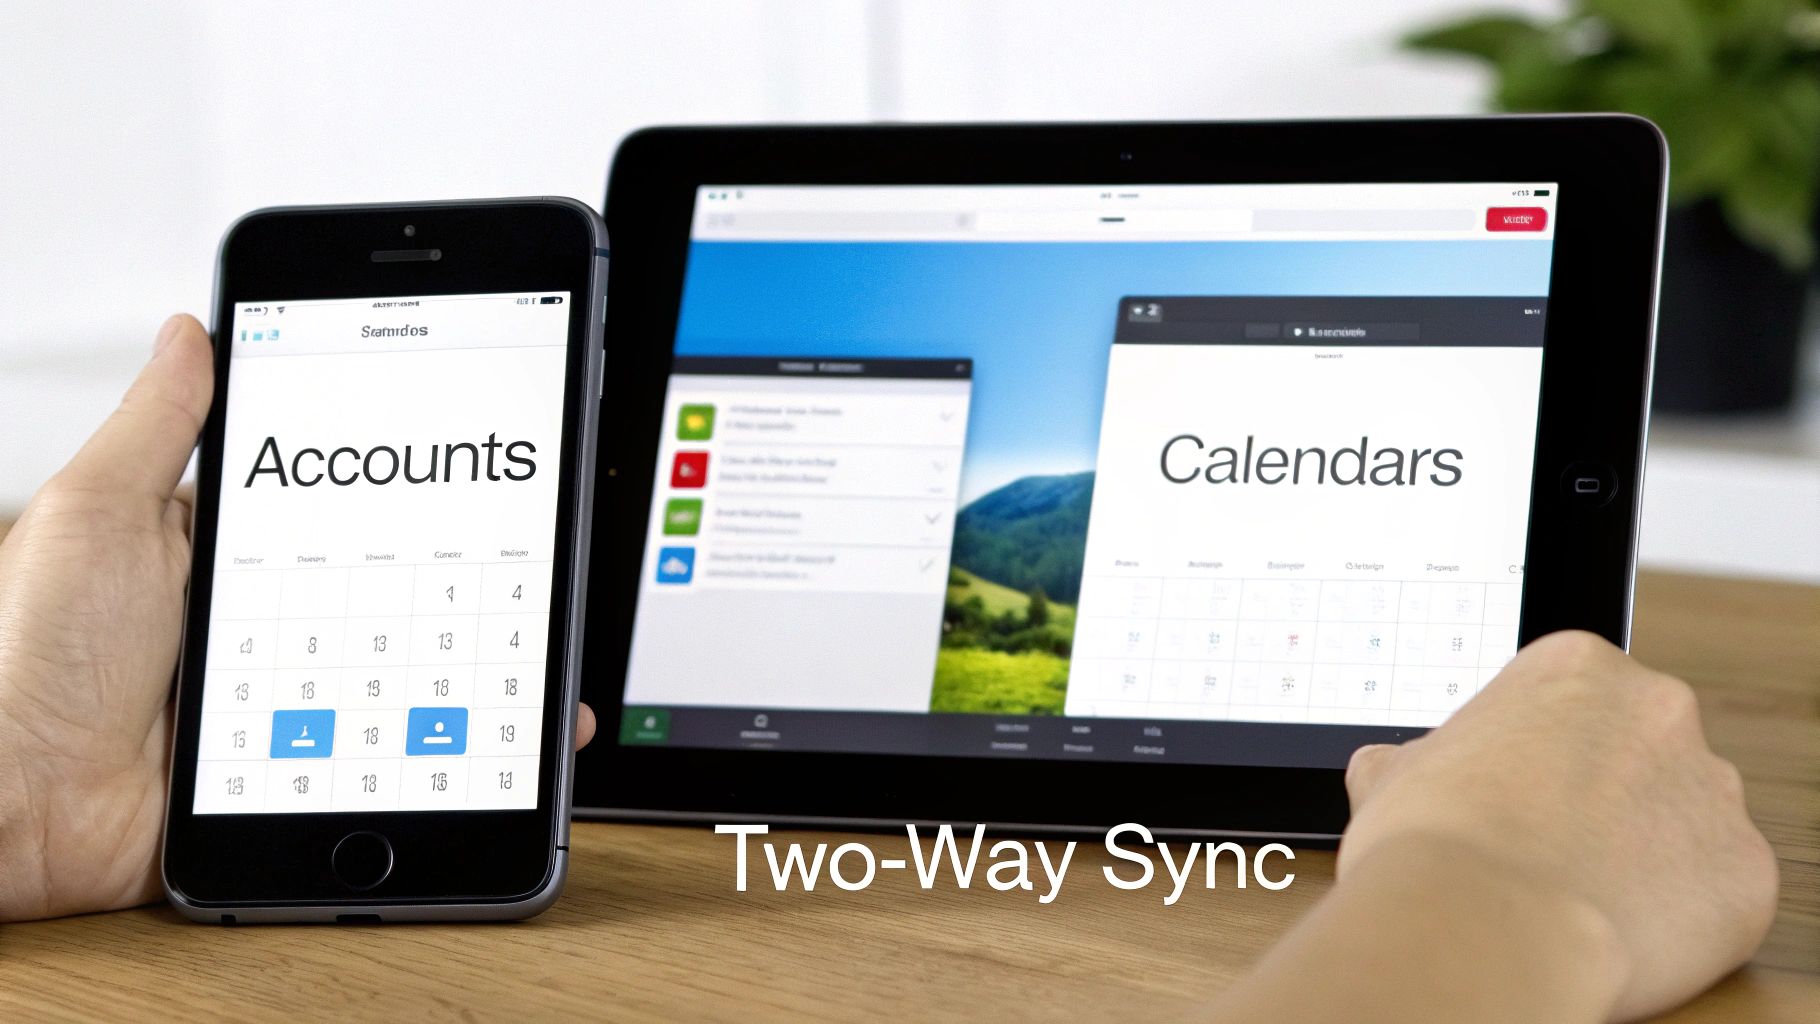
- Two-Way Sync: This is the full-fat, all-access pass. By adding your Google account directly to your Mac or iPhone, you get complete read-and-write permissions. Create an event in Apple Calendar, and it pops up in Google Calendar instantly. Edit a meeting on your work computer, and the change reflects on your phone.
- Read-Only Subscription: Think of this as a "view only" mode. You subscribe to a special link from your Google Calendar. It's perfect for keeping an eye on shared calendars—like a team holiday schedule, a project timeline, or a family member's agenda—without cluttering your own calendar with events you can't change.
Two-Way Sync vs Read-Only Subscription: Which Is Right for You?
Choosing the right sync method comes down to what you need to accomplish. This table lays out the core differences to help you decide.
| Feature | Two-Way Sync (Native Account) | Read-Only (Subscription) |
|---|---|---|
| Event Editing | Yes, create, edit, and delete from either calendar | No, events are view-only |
| Best For | Managing your primary work and personal schedules together | Viewing shared calendars (team, family, projects) |
| Setup Method | Add Google account directly to macOS/iOS | Subscribe via a public URL from Google Calendar |
| Update Speed | Nearly instant (push sync) | Can be delayed (fetches updates periodically, e.g., every 15 mins) |
| Invite Management | Yes, you can accept or decline invites from Apple Calendar | No, you cannot respond to invites |
| Privacy | Requires granting full calendar access to your Apple device | Only shares events you've made public or available via the link |
Ultimately, for most people who want a truly unified schedule they can manage from anywhere, the two-way sync is the way to go. If you just need to keep tabs on another calendar without interacting with it, a read-only subscription is a clean and simple solution.
Setting Up Full Two-Way Sync on iPhone and iPad
If you want a truly seamless schedule, you need the power to edit events from anywhere. This is exactly what a full two-way sync delivers—letting you add a meeting on your iPhone and seeing it pop up instantly on your work laptop's Google Calendar.
The best and most reliable way to get this done on your iPhone or iPad is by adding your Google account directly into iOS. It’s the set-it-and-forget-it solution that just works.
This method taps into Google’s native support for CalDAV, the protocol built specifically for calendar synchronisation. It ensures that any change you make—creating, editing, or deleting an event—is immediately pushed to Google’s servers and reflected everywhere else in near real-time. No more manual refreshes.
Diving Into Your Account Settings
First things first, you'll need to head into your iPhone or iPad's settings. This is the central hub where your device manages all its connections to external accounts, including email, contacts, and, of course, calendars.
- Pop open the Settings app on your iPhone or iPad.
- Scroll down a bit and tap on Calendar.
- From there, go to Accounts and then tap Add Account.
You’ll see a list of different service providers. Make sure you choose Google, as this triggers the optimised setup process that makes the connection quick, secure, and painless.
By adding your Google account at this system level, you're doing more than just syncing calendars. You're authorising your iPhone to act as a trusted client, which is what enables that instant push-and-pull of data that makes two-way syncing so powerful.
Making the Connection
Once you’ve selected Google, you’ll be prompted to sign in with your usual email and password. If you’re using two-factor authentication on your Google account (and you really should be), you'll need to complete that verification step here as well.
After you sign in, iOS will show you a screen with toggles for the different services you can sync: Mail, Contacts, Calendars, and Notes.
To keep things focused, just make sure the Calendars toggle is switched on. Feel free to disable the others if you already use dedicated apps, like the Gmail app for your email. Once you're set, tap Save in the top-right corner. That's it! Your Google Calendar events should start appearing in your Apple Calendar app automatically.
A Quick Check to Verify Everything Works
The final—and most important—step is to confirm the sync is actually working. Don't just assume it’s all good; a quick test now can save you from a major scheduling headache later.
- Check for Your Calendars: Open the Apple Calendar app and tap "Calendars" at the bottom of the screen. You should see a new section under your Gmail address listing all your Google Calendars. Make sure the ones you want to see have a tick next to them.
- Create a Test Event: Add a new event directly from the Apple Calendar app on your iPhone. The key is to make sure you select one of your Google Calendars when creating it.
- Confirm It Appeared Elsewhere: Now, jump over to your computer and open Google Calendar in a web browser. The test event you just created should show up within a few seconds.
If the event is there, you’re all set. You've successfully configured a full two-way sync, giving you one powerful, unified view of your entire schedule across both the Apple and Google worlds.
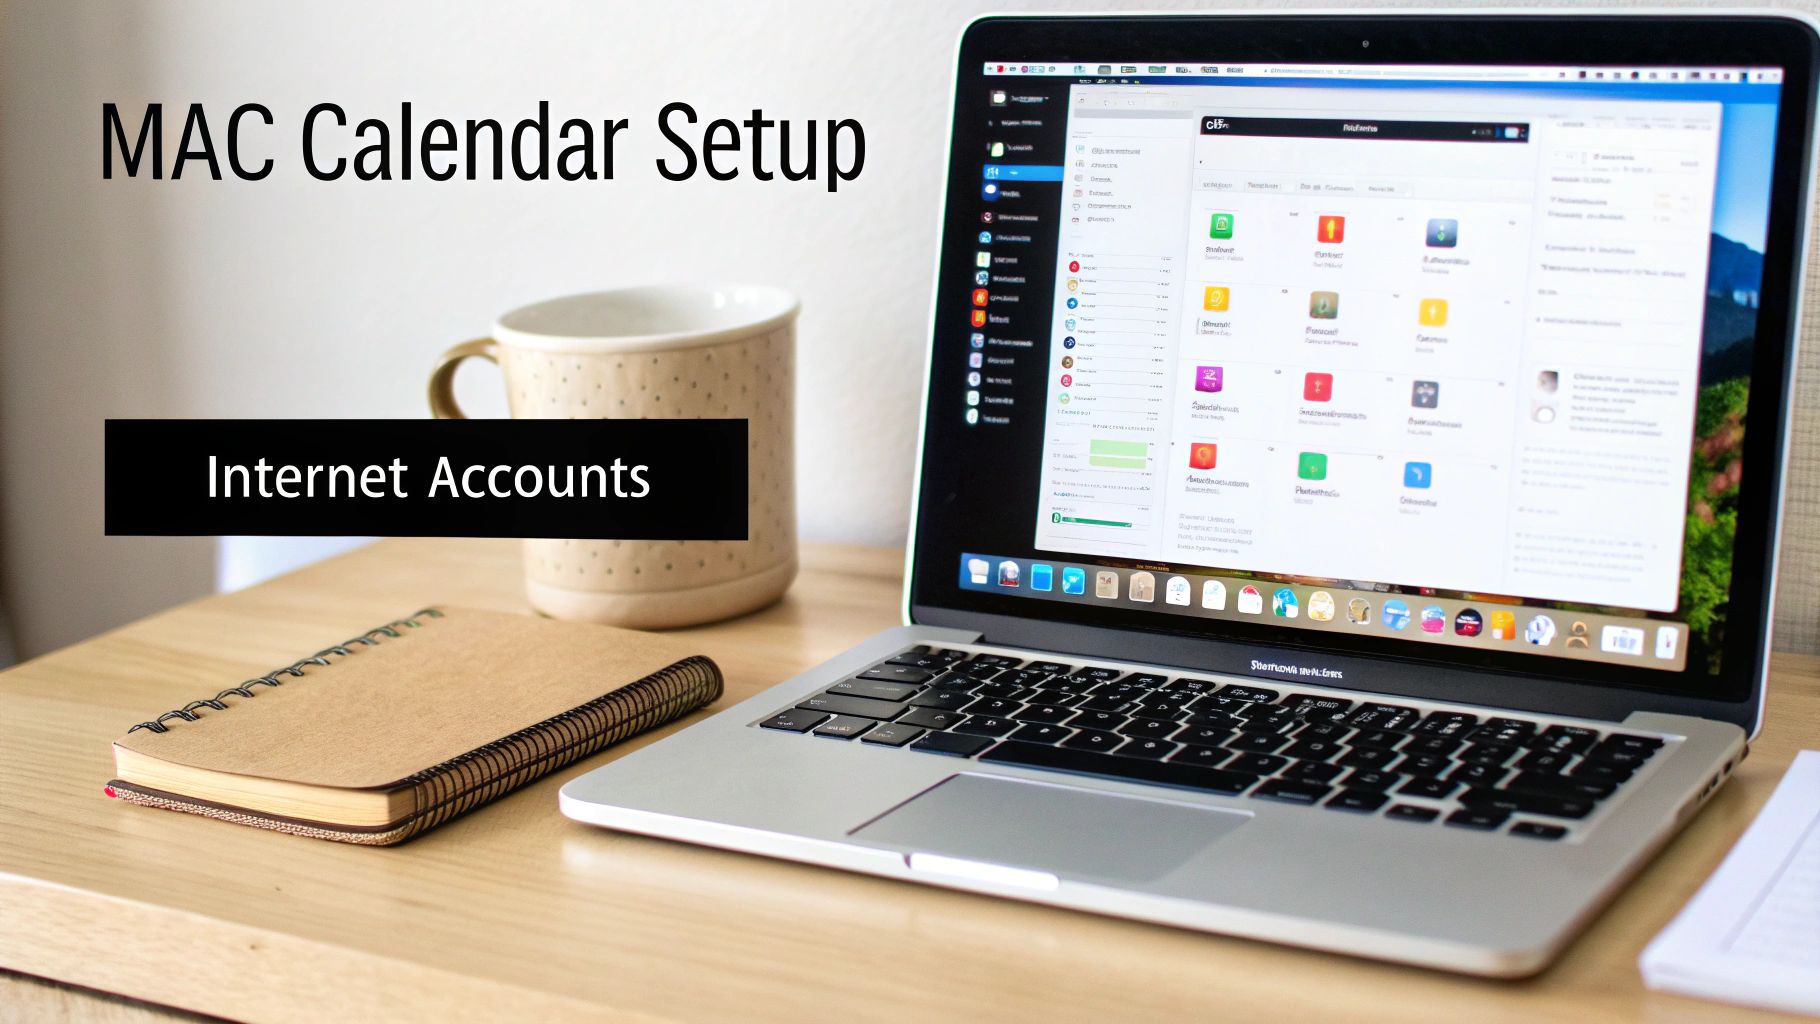
Integrating Google Calendar on Your Mac
For most of us, the Mac is where the real work happens. Getting your calendars talking to each other here is non-negotiable. The good news is that setting this up is a breeze, though the process lives in a slightly different spot than on iOS: your Mac’s Internet Accounts settings.
This built-in method is hands-down the best way to create a true two-way sync. It turns your Mac’s native Calendar app into a proper command centre for everything you’ve got going on, personal and professional.
With so many companies using different platforms, calendar fragmentation is a real headache. By 2025, it's expected that around 58% of German businesses with over 50 employees will be juggling multiple calendar systems. This leads to problems—around 42% of professionals admit to missing meetings or double-booking themselves every month simply because their schedules aren't in one place. You can read more about these calendar trends over at slashdot.org.
Finding Your Way to Internet Accounts
First things first, you need to open System Settings. The quickest way is to click the Apple icon in the top-left corner of your screen and select "System Settings." You can also just click the gear icon in your Dock.
Once you’re in, look at the left-hand sidebar and scroll down until you see Internet Accounts. Give that a click. This is where your Mac manages all its connections to outside services like iCloud, Google, and others.
Here you can see the "Internet Accounts" panel where you'll be adding your Google account.
As you can tell, Apple makes it pretty straightforward by listing Google as one of the main options.
Making the Final Connection
Go ahead and click on Google from the list of providers. A standard Google sign-in window will pop up. Just enter your email and password as you normally would. If you use two-factor authentication, you'll need to verify your identity here, too.
After you've successfully logged in, macOS will ask which parts of your Google account you want to sync up.
- Contacts
- Calendars
- Notes
Make sure the Calendars box is ticked. Feel free to untick the others if you’d rather keep your mail or contacts in their own separate apps.
Click Done, and you’re all set. macOS takes it from here, and your Google Calendar events will start appearing in the native Calendar app almost instantly. If you're someone who prefers a more specialised tool, you might find our guide on the best Google Calendar apps for Mac useful.
Pro Tip: To avoid accidentally scheduling a work meeting on your personal calendar, set a default. In the Calendar app, navigate to
Calendar > Settings > General. From there, you can choose which calendar—like your "Work" Google Calendar—should be used for any new events you create. It’s a simple tweak that saves a lot of hassle.
Using Read-Only Subscriptions for Shared Calendars
Sometimes, a full two-way sync is just overkill. You don't always need the ability to edit a calendar; you just need to see what's on it.
This is where a read-only subscription is perfect. Think of things like a team holiday rota, a shared project timeline, or even a family member's activity schedule. You want visibility without the risk of accidentally changing something.
This method essentially lets you “peek” at a Google Calendar right from your Apple Calendar app. You see all the events, but you can’t touch them. It’s a clean, one-way street of information that keeps you in the loop without cluttering up your own calendar.
Finding That Secret iCal Address
To make this work, you need a special link from Google, often called the "secret address in iCal format." This is the one step that trips people up, but it’s actually pretty straightforward once you know where to click.
Just a heads-up: you have to do this part on a computer. The option isn't available in the Google Calendar mobile app.
- Open Google Calendar in your web browser. Find the calendar you want to share in the sidebar on the left.
- Hover over its name, click the three little dots that pop up, and select Settings and sharing.
- Scroll down the page until you find the Integrate calendar section.
- Look for a field labelled Secret address in iCal format. That's the link you need. Go ahead and copy it to your clipboard.
A quick word of caution: treat this link like a password. Anyone who has it can see your calendar events, so only share it with people you absolutely trust. If you think it's been compromised, you can always come back to this same settings page to reset it.
Adding the Subscription to Your Mac
Alright, with the iCal link copied, getting it into your Mac’s Calendar app is a breeze.
- First, open the Calendar app on your Mac.
- From the menu bar at the very top of your screen, click File, then New Calendar Subscription.
- Paste that iCal address you copied from Google into the URL field and hit Subscribe.
From there, you can give the calendar a custom name, pick a colour for its events, and decide how often it should refresh. For something like a team calendar, setting the auto-refresh to every 15 or 30 minutes is usually a good bet.
This read-only approach is incredibly useful, especially for teams working across different platforms. In Germany, for example, many businesses rely on Google Calendar for its powerful collaboration tools. Its ability to easily share calendars is a big plus over Apple Calendar, which tends to keep things within the iCloud ecosystem. If you're curious, you can find more details on the differences between these calendar platforms on appypieautomate.ai. This method is a simple but effective way to bridge that gap.
Solving Common Calendar Sync Problems
Even with a perfect setup, things can still go sideways. When you connect Google Calendar and Apple Calendar, you're building a bridge between two totally different worlds. It’s no surprise that sometimes the traffic gets a little jammed. Don't worry, though—most of these issues are surprisingly easy to fix and rarely need more than a few taps.
The most common complaint I hear is delayed updates. You add an event on your Mac, but it takes ages to show up on your iPhone. Another classic frustration is seeing duplicate events cluttering up your schedule, leaving you wondering which one is the real deal. They're annoying problems, but thankfully, they’re solvable.
Kickstarting a Stalled Sync
Often, the simplest trick is the most effective. If your events just aren't appearing, the very first thing to try is a manual refresh. This basically forces the Apple Calendar app to ping Google's servers and pull in the latest information.
- First, open the Calendar app on your iPhone or Mac.
- On an iPhone, tap the Calendars button at the very bottom.
- Now, just pull down on the list of calendars. You'll see a little spinning refresh icon appear at the top. Let go, and give it a moment to update.
This quick action usually clears up minor delays right away. If you're still stuck, you can dig into some more advanced fixes in our detailed guide on troubleshooting Google Calendar sync problems.
Managing Your Data Refresh Settings
Your iPhone has a couple of ways it fetches new calendar data: Push and Fetch. Getting your head around the difference is the key to balancing instant updates with decent battery life.
- Push: This is your real-time option. The second an event is added to your Google Calendar, Google's server "pushes" it straight to your device. It’s instant, but it can be a bit of a battery hog.
- Fetch: With this, your iPhone checks for updates on a schedule you set—say, every 15 minutes, 30 minutes, or hourly. It's much kinder to your battery, but it means you might see a slight delay.
You can tweak these settings by heading to Settings > Calendar > Accounts > Fetch New Data. For your Google account, you can choose either Push or Fetch. If updates feel sluggish, make sure Push is turned on. If your battery is your main concern, switching to Fetch every 15 minutes is a fantastic compromise.
Most sync errors aren't a sign of a totally broken connection. Think of it more like a temporary communication breakdown. Forcing a refresh or even just toggling the calendar off and on in your account settings often clears the logjam and gets everything flowing again.
Dealing with Duplicate Events
Seeing double? That’s a classic sign you've probably added your Google account in more than one way. It happens all the time. For instance, you might have added the account through the main iOS settings for a full two-way sync and separately subscribed to a read-only version of that exact same calendar.
The fix is easy. Go back into your Apple Calendar app and tap the Calendars button. Take a close look at the list. If you see your work calendar listed twice—once under your main Google account and again under a "Subscribed" heading—just uncheck the subscribed version. This instantly tidies up your view without deleting any actual events, leaving you with one clean, accurate source of truth for your schedule.
Your Calendar Sync Questions Answered
Even when the sync is up and running, a few questions always seem to pop up. Getting these small details right is the difference between a system that works for you and one that just adds another layer of digital clutter. Let’s walk through a few of the most common ones I hear.
One of the biggest concerns is always privacy. It’s a totally valid question, especially when you’re connecting accounts from two different tech giants.
Will Syncing Share My Private Events?
Rest easy—absolutely not. When you link your personal Google account to Apple Calendar, it doesn't suddenly make your private events public.
An appointment you’ve marked as 'Private' in Google Calendar will show up as private on your iPhone and Mac. The sync is designed to mirror your calendar data, not to override the permissions and privacy settings you’ve already put in place. You’re still in full control of who sees what.
Think of it this way: the CalDAV sync method is about giving you access on a different device, not exposing your schedule to others. Your private stuff stays private.
Another common question is about speed. How quickly do new events actually show up everywhere else? It all comes down to your settings.
How Often Does Apple Calendar Sync With Google?
When you add your Google account directly, the updates are pretty much instant. This method uses Push technology, which means Google’s servers give your Apple devices a nudge the moment a change happens.
You can actually tweak this on your iPhone to save some battery. Head over to Settings > Calendar > Accounts > Fetch New Data. 'Push' gives you real-time updates, but you can switch to a 'Fetch' schedule (like every 15 minutes) if you prefer.
Just a heads-up: this doesn't apply to read-only subscribed calendars. Those are always "fetched" on a schedule set by Apple and Google, so they're a bit slower to update.
Can I Sync Only One Specific Google Calendar?
Yes, and this is a lifesaver. You don't have to flood your calendar with every single shared and personal calendar from your Google account. You get to pick and choose.
Here's how to customise the view:
- Pop open the Calendar app on your iPhone or Mac.
- On iOS, tap 'Calendars' at the bottom of the screen. On macOS, you'll see the list in the sidebar.
- You'll see every calendar listed under your Google account. Just tick the boxes for the ones you want to see and untick the ones you don't.
This is a game-changer for keeping your daily view clean, especially if you’re juggling multiple work projects or a shared family schedule. If you find yourself managing a ton of calendars, it might be worth checking out some of the best calendar apps for Mac that offer more advanced ways to organise everything.
If you're tired of manually managing multiple schedules and want to save time, Calendar0 can help. Our AI menubar calendar unifies all your Google and Microsoft calendars, prevents double-booking, and lets you schedule meetings with natural language. Try it for free and see how much time you can save. Learn more and download Calendar0 today.