Outlook App Mac OS: outlook app mac os Quick Setup, Sync & Troubleshooting
Explore the outlook app mac os in a practical guide covering setup, calendar sync, account management, and quick troubleshooting.
Calendar0 Team
December 9, 2025

Getting started with the Outlook app on Mac OS is refreshingly simple. I find most people can get from download to their first email in under 15 minutes, so you can get up and running without wrestling with a steep learning curve.
Setting Up Outlook on Your Mac for the First Time
Jumping into a new email client can feel like a chore, but getting Outlook installed and configured on a Mac is surprisingly painless. Think of this section as your launchpad. We’ll walk through the whole process, from grabbing the official app to setting the right permissions for notifications and calendar access—and I'll explain why getting those permissions right from the start is so important.
Microsoft’s commitment to a solid macOS app makes sense when you look at the numbers. It’s a key part of their cross-platform strategy, aimed squarely at professionals who love their Apple hardware but live inside the Office 365 suite. While Windows still holds the lion's share of the German desktop market at around 72.16%, macOS has carved out a respectable 5.62%. As you can see from the OS market trends on StatCounter, that user base is significant, especially in creative and corporate settings where a powerful Outlook client is non-negotiable.

To make sure you don't miss a beat, here's a quick checklist to guide you through the initial setup.
Outlook on Mac Initial Setup Checklist
This table breaks down the essential steps to get Outlook installed and running smoothly on your Mac for the first time.
| Phase | Action Item | Key Consideration |
|---|---|---|
| Installation | Download from the Mac App Store | Always use the official App Store to avoid unofficial installers and security risks. |
| First Launch | Choose between "New" or "Legacy" Outlook | The "New Outlook" is modern and streamlined. You can switch back anytime, so feel free to experiment. |
| Permissions | Grant access to Notifications & Calendar | This is critical. Denying these permissions will severely limit the app's core functionality. |
| Account Setup | Add your first email account | Have your email address and password ready. For company accounts, you might need specific server details. |
Following these steps in order will ensure everything is configured correctly right from the start, saving you from troubleshooting headaches later.
Downloading and Installing the App
First things first, head straight to the official Mac App Store. Don't bother with web downloads. Just search for "Microsoft Outlook" to find the verified app. This is the only way to guarantee you're getting the legitimate, secure version.
Once you find it, you'll see it has strong user ratings and frequent updates—a good sign that Microsoft actively maintains it.
After the download finishes, the installation is just like any other Mac app. Find it in your Applications folder, open it, and follow the simple on-screen prompts.
Choosing Your Outlook Experience
When you launch Outlook for the first time, it might ask if you want to try the "New Outlook." This is a redesigned interface Microsoft is rolling out to modernise the user experience.
- New Outlook: Feels much cleaner and more aligned with the web and mobile versions. It's generally faster and less cluttered.
- Legacy Outlook: The classic, familiar interface. If you've used Outlook on Mac before, this will feel like coming home.
Don't sweat this choice. You can easily toggle between the two designs right from the Outlook menu at the top of your screen. My advice? Start with the new one, and if it doesn't click with your workflow, switch back.
Granting Essential Permissions
For Outlook to be more than just a glorified text editor, it needs a few permissions from macOS. You’ll get pop-ups asking for access—these aren't just annoying formalities; they're vital.
Crucial Insight: Saying "yes" to Notifications and Calendar access is non-negotiable for anyone serious about productivity. Without them, you’ll miss meeting reminders and your calendar will be a blank slate, completely defeating the purpose of an all-in-one client.
You’ll be prompted to allow a few key things:
- Notifications: So you get alerts for new emails and upcoming appointments.
- Calendar Access: This lets Outlook sync with your Mac's calendar system.
- Contacts Access: Allows Outlook to pull from your address book so you don't have to type out every email address.
Denying these will cripple the app. It's best to approve them right away during setup to ensure everything just works from the get-go. With that handled, you're all set to add your accounts and get organised.
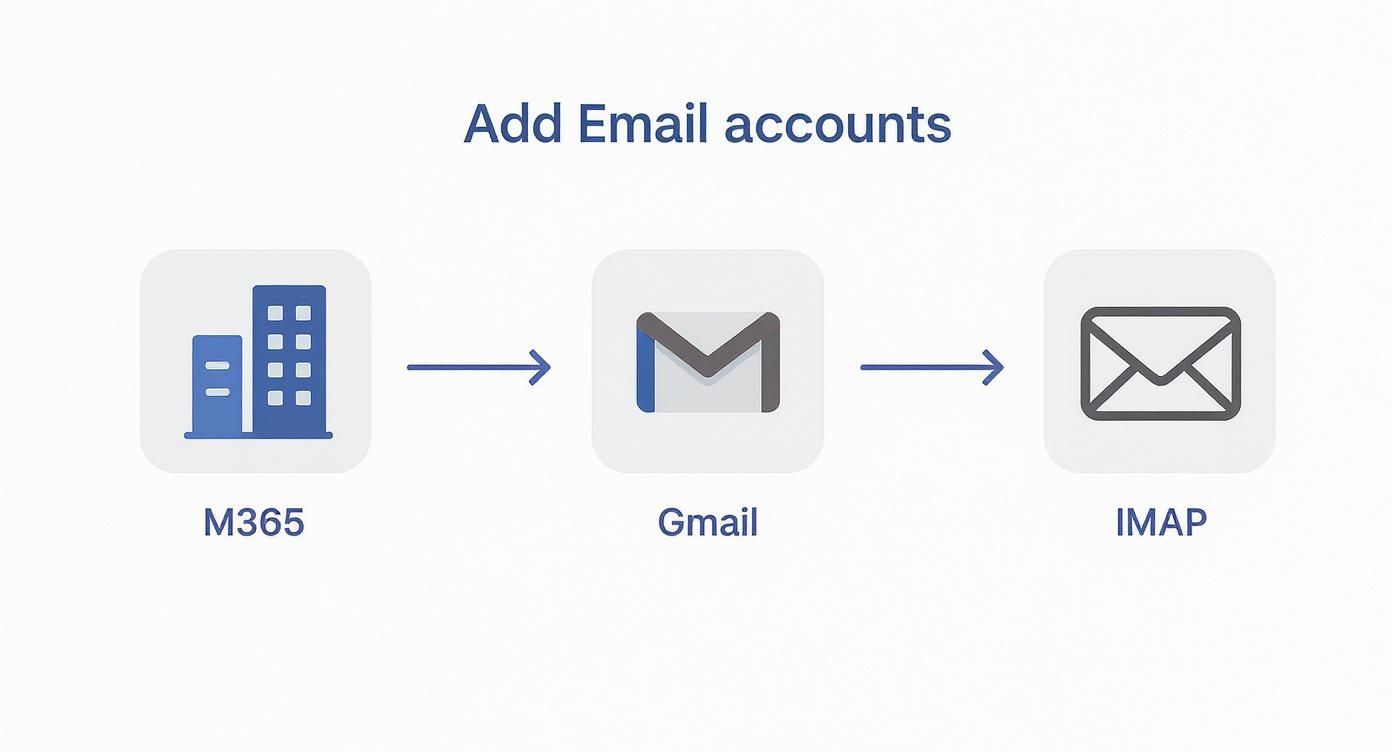
Bringing All Your Accounts Under One Roof
Let's be honest, the real power of a desktop email client like Outlook isn't just managing one inbox—it's about taming the chaos of your entire digital life. Most of us are juggling at least two accounts: a primary one for work and another for personal stuff. Getting them all into one organised hub is the goal.
We'll start with the easy one: adding a Microsoft 365 or Exchange account. Since Outlook is a Microsoft product, this is usually a seamless, almost automatic process. After that, we’ll walk through connecting your personal Gmail, which involves a slightly different security dance with Google.
Connecting Your Microsoft 365 or Exchange Account
If you’re using Outlook for your job, this is where you'll begin. Microsoft has made adding a work account incredibly straightforward, often just needing your email and password to get everything up and running.
Just head over to Outlook > Settings > Accounts and hit the little plus (+) icon to add a new account. Pop in your work email, and Outlook's autodiscover feature should take it from there. It talks directly to Microsoft's servers to figure out all the settings on its own. Seriously, you can be done in less than a minute.
If your company uses multi-factor authentication (MFA)—and most do these days for security—you'll get a prompt to verify who you are. This usually means approving a notification from an app like Microsoft Authenticator or typing in a code sent to your phone.
Integrating Your Personal Gmail Account
Now, let's get your personal life into the picture by adding your Gmail account. The initial steps are the same, but you’ll notice a key difference because of how Google handles security. Once you enter your Gmail address, Outlook will open a Google sign-in window.
Don't be alarmed; this is actually a good thing. It’s a crucial security step ensuring that Outlook never actually sees or stores your Google password. You're signing in directly with Google, which then gives Outlook a secure token to access your account.
A Quick Heads-Up: If you have two-factor authentication enabled on your Google account (and you really should), have your phone ready. You'll need to approve the login or enter a verification code to finish the process. It's that extra layer that keeps your personal emails safe while letting them live happily inside Outlook.
Once you’re authenticated, Outlook will pull in all your emails, calendar events, and contacts from Google.
Setting Up Other Accounts with IMAP or POP
What about email from other providers? If you're using a service like GMX, Yahoo, or an email on your own custom domain, you'll probably be using IMAP or POP. These are just standard protocols for fetching email.
When you try to add an account that Outlook doesn't immediately recognise, it will ask you to choose between the two. Here's a quick guide to help you decide:
- IMAP (Internet Message Access Protocol): This is what you should use 99% of the time. IMAP keeps everything synchronised. Read an email on your Mac, and it’s marked as read on your phone. Delete it from your tablet, and it’s gone everywhere. It’s built for how we work today, across multiple devices.
- POP (Post Office Protocol): This is the old-school way. It downloads your emails to one device and often deletes them from the server. It’s pretty rare now, but it could be useful if you need to keep a local, offline archive of your emails. Unless you have a very specific reason, stick with IMAP.
To set up either, you'll need the incoming and outgoing server addresses from your provider (e.g., imap.yourprovider.com and smtp.yourprovider.com). A quick search of their help section should give you everything you need.
Managing Your Accounts for Peak Productivity
Okay, all your accounts are in. The last step is making them work for you. By default, Outlook keeps each account separate in the sidebar, which is fine. But if you're using the "New Outlook" experience, you can create a Unified Inbox. This view pulls all your incoming emails into a single feed, which is a lifesaver for getting a quick glance at everything at once.
One last pro tip: set your default sending account. Go to Outlook > Settings > Composing and pick the email address you use most. This tiny change can save you from the classic mistake of accidentally sending a personal message from your professional address. It’s a simple fix for a potentially awkward problem.
Mastering Calendar Sync and Notifications
An email client without a solid calendar is only half a tool. Let's be honest, the real test for Outlook on macOS is how well it wrangles your schedule, especially when you’re juggling calendars from different services. Getting this synchronisation right is what separates a chaotic workday from a productive one.
First, we’ll get your Outlook calendar to play nicely with your Mac's own Calendar app to avoid any weird conflicts. Then, we'll dive into the big one: unifying your work Outlook and personal Google calendars to finally stop double-booking yourself. It’s all about bringing everything into one place you can trust.
Before you can sync anything, you need to get your accounts added. Outlook makes this pretty straightforward.
As you can see, Outlook is built to handle Microsoft's own services, Google's massive ecosystem, and standard IMAP accounts with equal ease, making it a powerful central hub.
Unifying Your Calendars to Prevent Conflicts
We’ve all been there. You accept a work meeting on your Outlook calendar, completely forgetting you’ve got a dentist appointment logged in your personal Google Calendar at the exact same time. It’s stressful and unprofessional.
The fix is a single, unified view of your availability. While Outlook can show multiple calendars side-by-side, true unification often needs a bit more. For instance, you probably want to see your Google events appear directly inside your Outlook work calendar grid. Our guide on how to sync your Outlook Calendar with Google walks you through this exact process.
By having one calendar "subscribe" to the other, you create a read-only copy of your commitments. This means when you check your availability in Outlook, you see everything, no matter where it came from. Problem solved.
Syncing with the Native macOS Calendar App
Even if you live and breathe Outlook, your Mac has its own system-level calendar that other apps often tap into. To make your life truly seamless, you should make sure your Outlook events are visible across the entire operating system.
It’s actually quite simple. Just add your Outlook account directly into your Mac's System Settings.
- Head over to System Settings > Internet Accounts.
- Click Add Account and choose Microsoft Exchange.
- Sign in with your Outlook or Microsoft 365 details.
- Most importantly, make sure the Calendars box is ticked.
That's it. This small step lets your Mac’s native Calendar app, widgets, and other integrated tools see your Outlook schedule. You’ll never miss an event just because you weren’t looking directly at the Outlook app.
Customising Notifications to Reclaim Your Focus
A constant flood of notifications is the enemy of deep work. A reminder for a meeting in an hour? Useful. A pop-up for every single promotional email? Not so much. Thankfully, Outlook for macOS gives you fine-grained control over these alerts.
Just go to Outlook > Settings > Notifications & Sounds. In here, you can set up different rules for each of your accounts. You could, for example, have your work account play a sound for new emails while keeping your personal Gmail on silent.
Pro Tip: Don't just turn notifications on or off. You can get really specific. Configure Outlook to only show alerts for emails in your "Focused Inbox" or for messages where someone @mentions you. This is a total game-changer for cutting out the noise.
This level of customisation transforms notifications from an annoying interruption into a valuable signal. It's features like this that contribute to Outlook's strong position, holding a global desktop market share of about 7.8%. You can dig into more data on email client market share from Litmus if you're curious. By taking a few minutes to master these settings, you put your calendar and notifications to work for you, not against you.
Solving Common Outlook Problems on macOS
Even the most dependable software hits a snag now and then, and Outlook on macOS is no different. When it’s central to your workflow, any little glitch can feel like a massive roadblock. The good news? Most common issues are surprisingly simple to fix, and you can get back to your day in minutes.
In my experience, Outlook problems usually fall into a few predictable buckets: authentication headaches, emails that won't send, and a search bar that suddenly stops searching. Let’s walk through them, starting with the most infuriating of all.
Why Does Outlook Keep Asking for My Password?
There’s almost nothing more annoying than Outlook repeatedly demanding your password when you know you're typing it in correctly. This isn't usually about you forgetting the password; it’s a symptom of a deeper issue with how macOS stores your account credentials in its Keychain Access.
Think of your Mac's Keychain as a secure digital wallet for your passwords. Sometimes, the authentication token it saves for Outlook gets corrupted or goes stale, especially right after you've changed your password elsewhere. Outlook gets confused and keeps asking for a password it can't validate.
Here’s the quick fix to clear it up:
- First, completely quit the Outlook app (Cmd+Q).
- Open the Keychain Access app. The easiest way is to use Spotlight (Cmd+Space) and just type it in.
- In the search bar at the top right, type “Office” and then "Outlook" to filter the list.
- Find any entries that mention your email account or "Microsoft Office" and delete them.
- Now, relaunch Outlook. It will ask for your password one last time, but this time it will create a fresh, uncorrupted entry in your Keychain.
This little reset solves the password loop for almost everyone, letting Outlook connect without a fuss.
When Emails Get Stuck in Your Outbox
You've just crafted the perfect email, hit send, and moved on with your day—only to find out hours later that it's still languishing in your outbox. This classic problem almost always points to one of two things: a spotty connection or an attachment that’s just too big.
Before you do anything else, check your internet connection. A brief Wi-Fi drop is often all it takes to stall the sending process.
If your connection is solid, the attachment size is the next likely culprit. Many email servers have strict size limits, often around 20-25 MB. Trying to push a massive file through will get it stuck every time. The modern solution is to upload the file to OneDrive or Dropbox and share a link instead of attaching the file itself.
Key Takeaway: If an email is stuck, don't just keep mashing the "Send/Receive" button. Open the message from your Outbox, remove the attachment, and try sending it again. This often clears the logjam instantly.
Fixing a Broken Search Function
A search bar that doesn't work turns your beautifully organised email archive into a useless data pile. When Outlook search comes up empty or gives you incomplete results, the problem isn't usually with Outlook itself. It’s with Spotlight, the system-wide indexing service that Outlook hooks into.
When the Spotlight index for your Outlook profile gets corrupted, search breaks. The most reliable fix is to force a re-index. This sounds technical, but it’s a straightforward process that tells macOS to go back and re-catalogue all your email data from scratch.
Resolving Pesky Sync Errors
Sync errors can pop up with cryptic messages, but they're usually just a sign of a communication breakdown between Outlook and your email server. Sometimes these are temporary hiccups on the server's end that resolve themselves.
But if you're constantly fighting sync issues, especially with calendars, it might be time to look at more robust solutions. For those juggling calendars across different platforms, our guide on the Outlook CalDAV synchronisation process can be a real lifesaver.
We've all been there—a sync issue pops up at the worst possible time. Here's a quick cheat sheet for figuring out what's going on.
Troubleshooting Outlook Sync Issues
| Symptom | Likely Cause | Recommended Solution |
|---|---|---|
| Calendar events are missing or outdated | Intermittent server connection or a stale cache | Click "Send/Receive" to force a manual sync. If that fails, clear the cache for the affected calendar. |
| New emails aren't arriving | Poor internet connection or an offline/disconnected status | Check your Wi-Fi/internet connection first. Then, verify Outlook is set to "Work Online" under the Tools menu. |
| "Connection to the server failed" error | Incorrect server settings, VPN interference, or a temporary server outage | Disable your VPN temporarily to test. Double-check your account server settings for typos. |
Most of the time, a simple manual sync or a quick check of your internet connection is all it takes to get things moving again.
It's also worth remembering that sometimes app issues can be confused with wider system problems. If you're running into strange behaviour across multiple apps, it's worth checking for other potential causes, like in this guide for troubleshooting MacBook Pro camera issues. By methodically working through these common fixes, you can keep Outlook running smoothly and stay productive.
Productivity Tips for Outlook Power Users
Okay, so you've got your accounts set up and your calendars are syncing nicely. The basics are covered. Now it's time to unlock what the Outlook app on Mac OS can really do. Moving beyond just sending and receiving emails can genuinely change how you manage your day, transforming a chaotic inbox into a clean, efficient command centre. These are the tips I use to automate, organise, and speed up my own workflow.

Automate Your Inbox with Rules
Let's be honest, your inbox is constantly flooded with newsletters, notifications, and other messages that don't need your immediate attention. Instead of manually dragging this stuff into folders every day, let Outlook do the heavy lifting for you with Rules.
Think of Rules as simple "if-then" commands you set up once. For instance, you could create a rule that says, "If an email arrives from 'newsletter@company.com,' then move it to the 'Reading List' folder." Boom. Your main inbox stays clean and focused on what actually matters.
Setting one up is straightforward:
- Find an email you want to create a rule for and right-click on it.
- Go to Rules > Create Rule.
- Define the conditions (like a specific sender or words in the subject line).
- Tell Outlook what to do with it (move it to a folder, mark it as read, or just delete it).
Start with a few of your most frequent, low-priority senders. You'll be surprised how much clutter disappears within a week, saving you a ton of time and mental energy.
Execute Multi-Step Actions with Quick Steps
Some email workflows are just plain repetitive. An update on a project comes in, and you have to move it to the project folder, flag it for follow-up, and forward it to a team member. Doing that manually ten times a day is a drag.
This is exactly what Quick Steps were made for. This feature lets you bundle a bunch of actions into a single click. You could create a Quick Step called "Project Update" that does all three of those things at once.
Power User Insight: Think of Quick Steps as macros for your email. I've found that by identifying my most common multi-step processes, I can automate them and cut out dozens of clicks each day. It also ensures important messages are handled consistently every single time.
Visually Organise with Categories
A packed inbox can feel like a solid wall of text, making it impossible to spot what's important at a glance. Categories are the solution. They let you assign colour-coded labels to emails, calendar events, and even contacts.
You can create categories for literally anything:
- By Project: Assign a unique colour to each big project you're juggling.
- By Priority: Red for "Urgent," yellow for "Needs Follow-Up," and green for "Done."
- By Team: Colour-code emails from different clients or internal departments.
This simple visual system lets you instantly gauge your workload just by scanning the colours in your inbox. Prioritising becomes faster and way more intuitive.
Save Time with Email Templates
Find yourself typing the same replies over and over again? Things like weekly status reports or answers to frequently asked questions? Outlook’s Templates feature is a massive time-saver here.
Just write the message you want to reuse, then go to File > Save as Template. The next time you need it, a quick trip to File > New > Email from Template has it ready to go. To take it a step further, our guide on scheduling emails in Outlook can help you streamline your outgoing messages even more.
To really maximise your time, it's worth exploring how to automate repetitive tasks not just in Outlook, but across your whole macOS setup. It frees you up to focus on the work that actually requires your brainpower.
This kind of proactive productivity is becoming more important. Market projections for Germany point to growing Outlook app usage on macOS, partly because the German AI computer market—valued at USD 4.09 billion in 2024—is booming. With expected growth of 31.3% CAGR from 2025 to 2030, we're seeing a wider move towards advanced computing where tools like Outlook for Mac, especially with AI features like Microsoft Copilot, are central. By adopting these power user habits now, you're not just cleaning up your inbox—you're getting ahead of the curve.
Got Questions? We've Got Answers
Even the best guides can leave you with a few lingering questions. When you're in the middle of setting things up, specific little issues always seem to crop up. Here are some quick-fire answers to the most common queries we hear about getting Outlook to play nice on a Mac.
Is the Outlook App Really Free on macOS?
Yep, it is. You can grab the Microsoft Outlook app straight from the Mac App Store without paying a penny. It works perfectly for personal accounts like Outlook.com, Gmail, Yahoo, and others without needing a Microsoft 365 subscription.
The catch? If you’re connecting a work or school account that runs on Microsoft Exchange, you'll need a valid Microsoft 365 licence, which your company or institution usually provides. For personal use, though, you’re good to go.
Can I Actually Recall an Email Sent from Outlook on a Mac?
This is a big one, and the answer, thankfully, is now yes! For ages, this was a Windows-only superpower, leaving Mac users out in the cold. With the latest versions of the New Outlook for Mac, the recall feature has finally arrived.
But there are a few conditions for it to work:
- You and the person you emailed must both be on a Microsoft 365 or Exchange account within the same organisation.
- The recipient can't have opened the email yet.
- The message needs to be sitting unread in their inbox.
If you tick all those boxes, just head to your Sent Items folder, open the message you want to pull back, and click Message > Recall.
My Outlook Search Is Broken. How Do I Fix It?
There's nothing more maddening than when the search bar gives you nothing. When this happens, it's almost always a problem with a corrupted Spotlight index, since Outlook piggybacks on macOS's own search technology. The quickest fix is to force your Mac to re-index everything.
It sounds more technical than it really is. All you need to do is tell Spotlight to forget about your Outlook files for a moment, and then add them back.
Head to System Settings > Siri & Spotlight, find the Spotlight Privacy section at the bottom, and drag your main Outlook profile folder into that list. Give it a second, then just remove the folder from the list. This kicks off a full re-index, which should get your search working again.
A Quick Note on Security: It’s a good reminder of how deeply integrated Spotlight is. Researchers have pointed out vulnerabilities in the past (like the "Sploitlight" issue), where its system-level access could be misused. This is why keeping your macOS updated isn't just about new features—it’s about patching security holes to keep core tools like this safe and functional.
What's This "New" vs. "Legacy" Outlook Thing?
When you fire up the app, you might get asked to choose between the "New Outlook" and "Legacy Outlook." It really just boils down to what you prefer and what you need to get done.
- New Outlook: This is the modern, slicker version designed to look and feel like the web and mobile apps. It's generally a bit snappier and gets all the new toys first, like that email recall feature we just talked about.
- Legacy Outlook: This is the classic interface that long-time users will find familiar. It might still have a few niche features or support for older plug-ins that haven't made their way over to the new version yet.
You can hop between them anytime by going to the Outlook menu and flicking the "New Outlook" switch on or off. I'd recommend starting with the new version—it's where all the future improvements will be.
Tired of the calendar chaos and the endless back-and-forth scheduling? Calendar0 is an AI menubar calendar that cuts through the noise. It brings all your Google and Microsoft calendars into one clean, conflict-free view. Schedule meetings just by typing, find open slots in an instant, and reclaim up to 20 minutes every single day. Stop juggling tabs and start managing your time at the speed of thought. Get your unified calendar today at https://www.calendar0.app.